Sensing Motion in Performance

We wanted to try out ways of sensing motion during performances and using that to control lights and other aspects of the show. For a percussionist, the most important movements occur at their hand but as they are already holding sticks we needed a wearable solution for motion sensing

I bought a number of different motion sensors, often call IMUs (Inertial Measurement Units) from AliExpress. These little boards include a tiny sensor that would often be used in smartphones or game controllers, on a board just big enough to solder wires and use in prototyping.

synesthetic-motion - 3

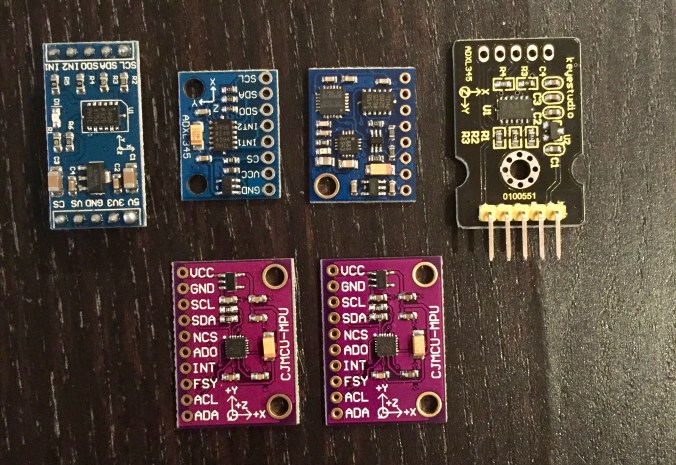
Some of these boards are more powerful, including accelerometers, gyroscopes and digital compass sensors, but this data is a bit more complex to process, so for our prototype performance we chose to use a simpler accelerometer board (ADXL345). I found SparkFun’s hookup guide and library really helpful in getting started with this chip and we soon had a hacked together wireless sensor to experiment with.

synesthetic-motion - 2

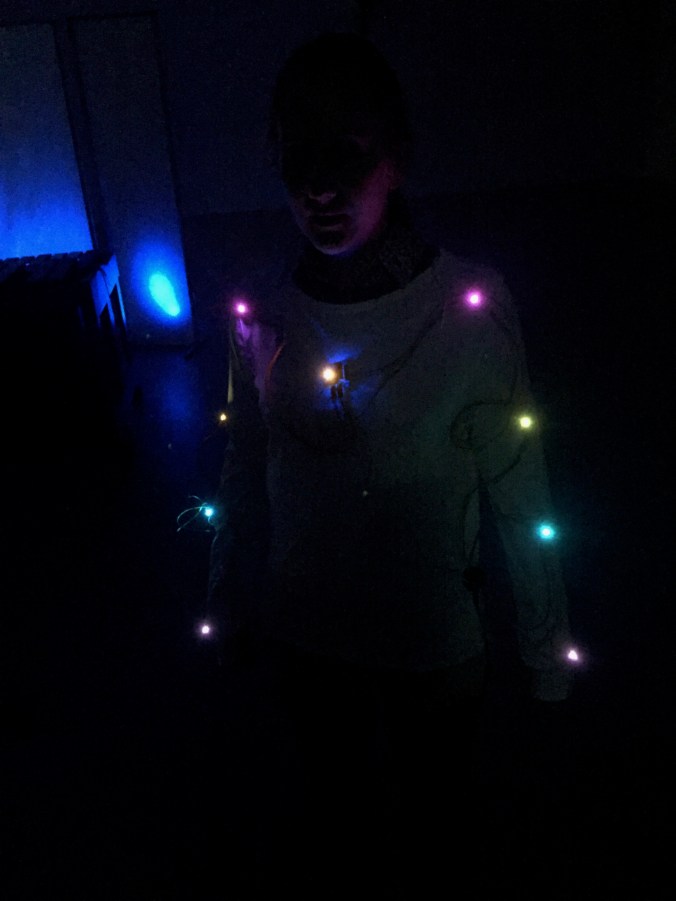
We tried out a few ways of mapping accelerometer data to lights in our development sessions. The most successful so far was to detect “strike” gestures, marked by a sharp increase in aggregated acceleration, and use that to turn on the costume lights. This way, the lighting on Christina’s costume was related to her percussive gestures.

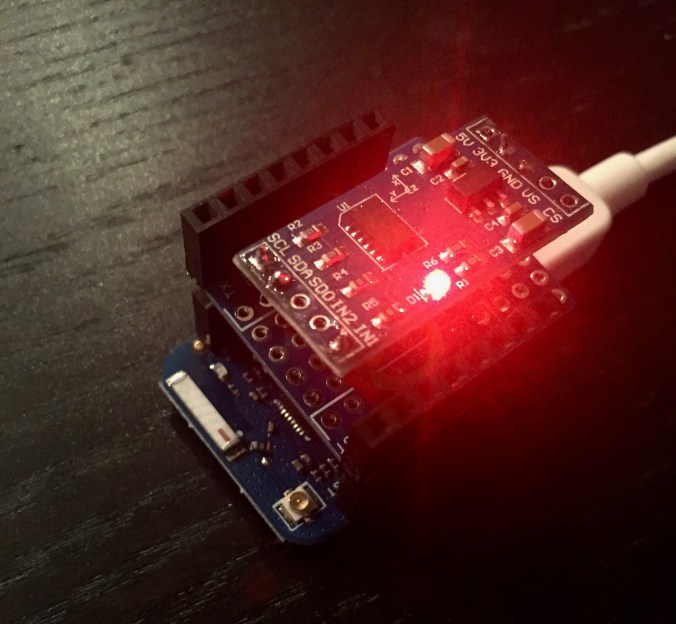
I soldered one of the ADXL sensors to a Wemos D1 Mini board to make a lighter and smaller sensor that we could use in performance:

synesthetic-motion - 4

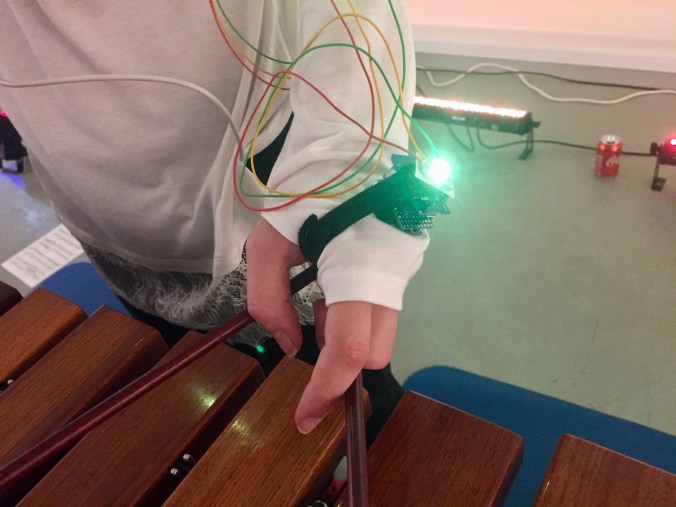
In the prototype performance, we just velcro’d this to Christina’s hand and attached a small USB battery to her forearm for power. We could mount her hand LED right on top of the motion sensor. Simple, but worked!

synesthetic-motion - 1


RGB Light Costume

Today we finished a testing version of our RGB light costume, this is a white shirt with nine LEDs that can be controlled over the wireless network to change colour during the performance.

The current design has four LEDs on each arm of the shirt and a central LED on the micro-controller board. Each LED module is attached to the shirt with velcro so that we can remove the electronics easily.

For this design, we used:

The firmware for the micro controller is here.

Here’s the controller board and one LED module:

Each of the LED modules contains a WS2812 ‘intelligent’ LED that can be controlled by a data signal from a micro-controller. At this point we are controlling all nine LEDs in the costume simultaneously, but they could also be addressed individually to program animations or movement effects.

These lights are surprisingly powerful! We tried out mapping the same pitch-mapped colours as our stage lights to the costume lights which are very convincing from the audience’s perspective!

synesthetic - 19

Day 1 in workshop week

Today we got the space at NyDans in Nydalen, Oslo.  It is a very large dance hall that the royal ballet used as a rehearsal space before the new opera house was built. Today we used the time to transport all our equipment to the space and tryout what we call “Session nr.1”. We diveded the notes on the marimba into three main areas one for each color (R,G,B). We used pd to analyse the sound from the marimba, and in that way connect the lights to the tones on the marimba. The highest notes had the color red, the center got green and the bass had blue. 

It was soon clear that we need to connect  the computer to our arduino through an ethernet cable because the WiFi had too much delay. We will continue working on our sound analysis method tomorrow and fixing a ethernet cable and use external external audio card with microphones connected closer to the instrument. Pd did have some trouble with the analysis because of external sounds which we hope to get rid of with microphones and external audio card.

Controlling lights wirelessly

One of the first steps for developing our wearable performer system was to control RGB lights wireless over a wifi network. We put together some of our Wemos micro controller boards with some sewable NeoPixels and can now control them over the network! Cool!

In these pictures the colour of the led is controlled from a laptop. We put together a little test program in Pd (pure data) to allow us to control the signals with little sliders, but for the performance we might use physical controllers or control them automatically using sound or movement.

We also realised that the Wemos boards could be easily powered by a regular USB battery pack – just like a smartphone. These are probably the easiest solution for power in the prototyping stage.

The little white case in the photos was a bit of an experiment; at my workplace (UiO Department of Informatics), some of my colleagues are experienced 3D printers, they found a little Wemos D1 case on Thingiverse and printed one out for me! Cool! I think we’ll print out a few more for our prototyping process as they have nice holes for sewing or mounting and could fit a few parts inside – I think we’ll need to adjust the design so that there’s a hole in the side for wires or connectors for the lights.